
The best ice cream this summer is the one you create: Make your own flavors with this easy vanilla base and five smart tips.
Turn your homemade ice cream into a sundae bar with your favorite toppings. David Malosh for The New York Times. Food Stylist: Barrett Washburne.
Imagine a cookie dough ice cream that actually has enough cookie dough in it: That’s just one thrill of making your own ice cream. Sure, it requires a machine and a bit of patience, but there’s nothing sweeter on a hot summer day than scooping a flavor of your creation.
I fell in love with making ice cream when I was young, helping my mom manage ice and salt levels in an old-fashioned churning bucket. (She makes a fantastic chocolate.) That passion eventually led me to complete a professional ice cream course at Penn State’s Department of Food Science. These days, I like to experiment with flavors based on other desserts, like peanut butter pie, with chocolate cookie pieces (the crust) and chocolate shards (the topping) rippling through creamy peanut butter ice cream (the filling). It’s a recipe that captures the pie’s best — and one you probably won’t find at scoop shops.
Half the fun of making ice cream at home is letting yourself get creative, and the base recipe here, along with the five tips below, are all you need to get started. Then, channel your inspiration into your very own dream scoop.
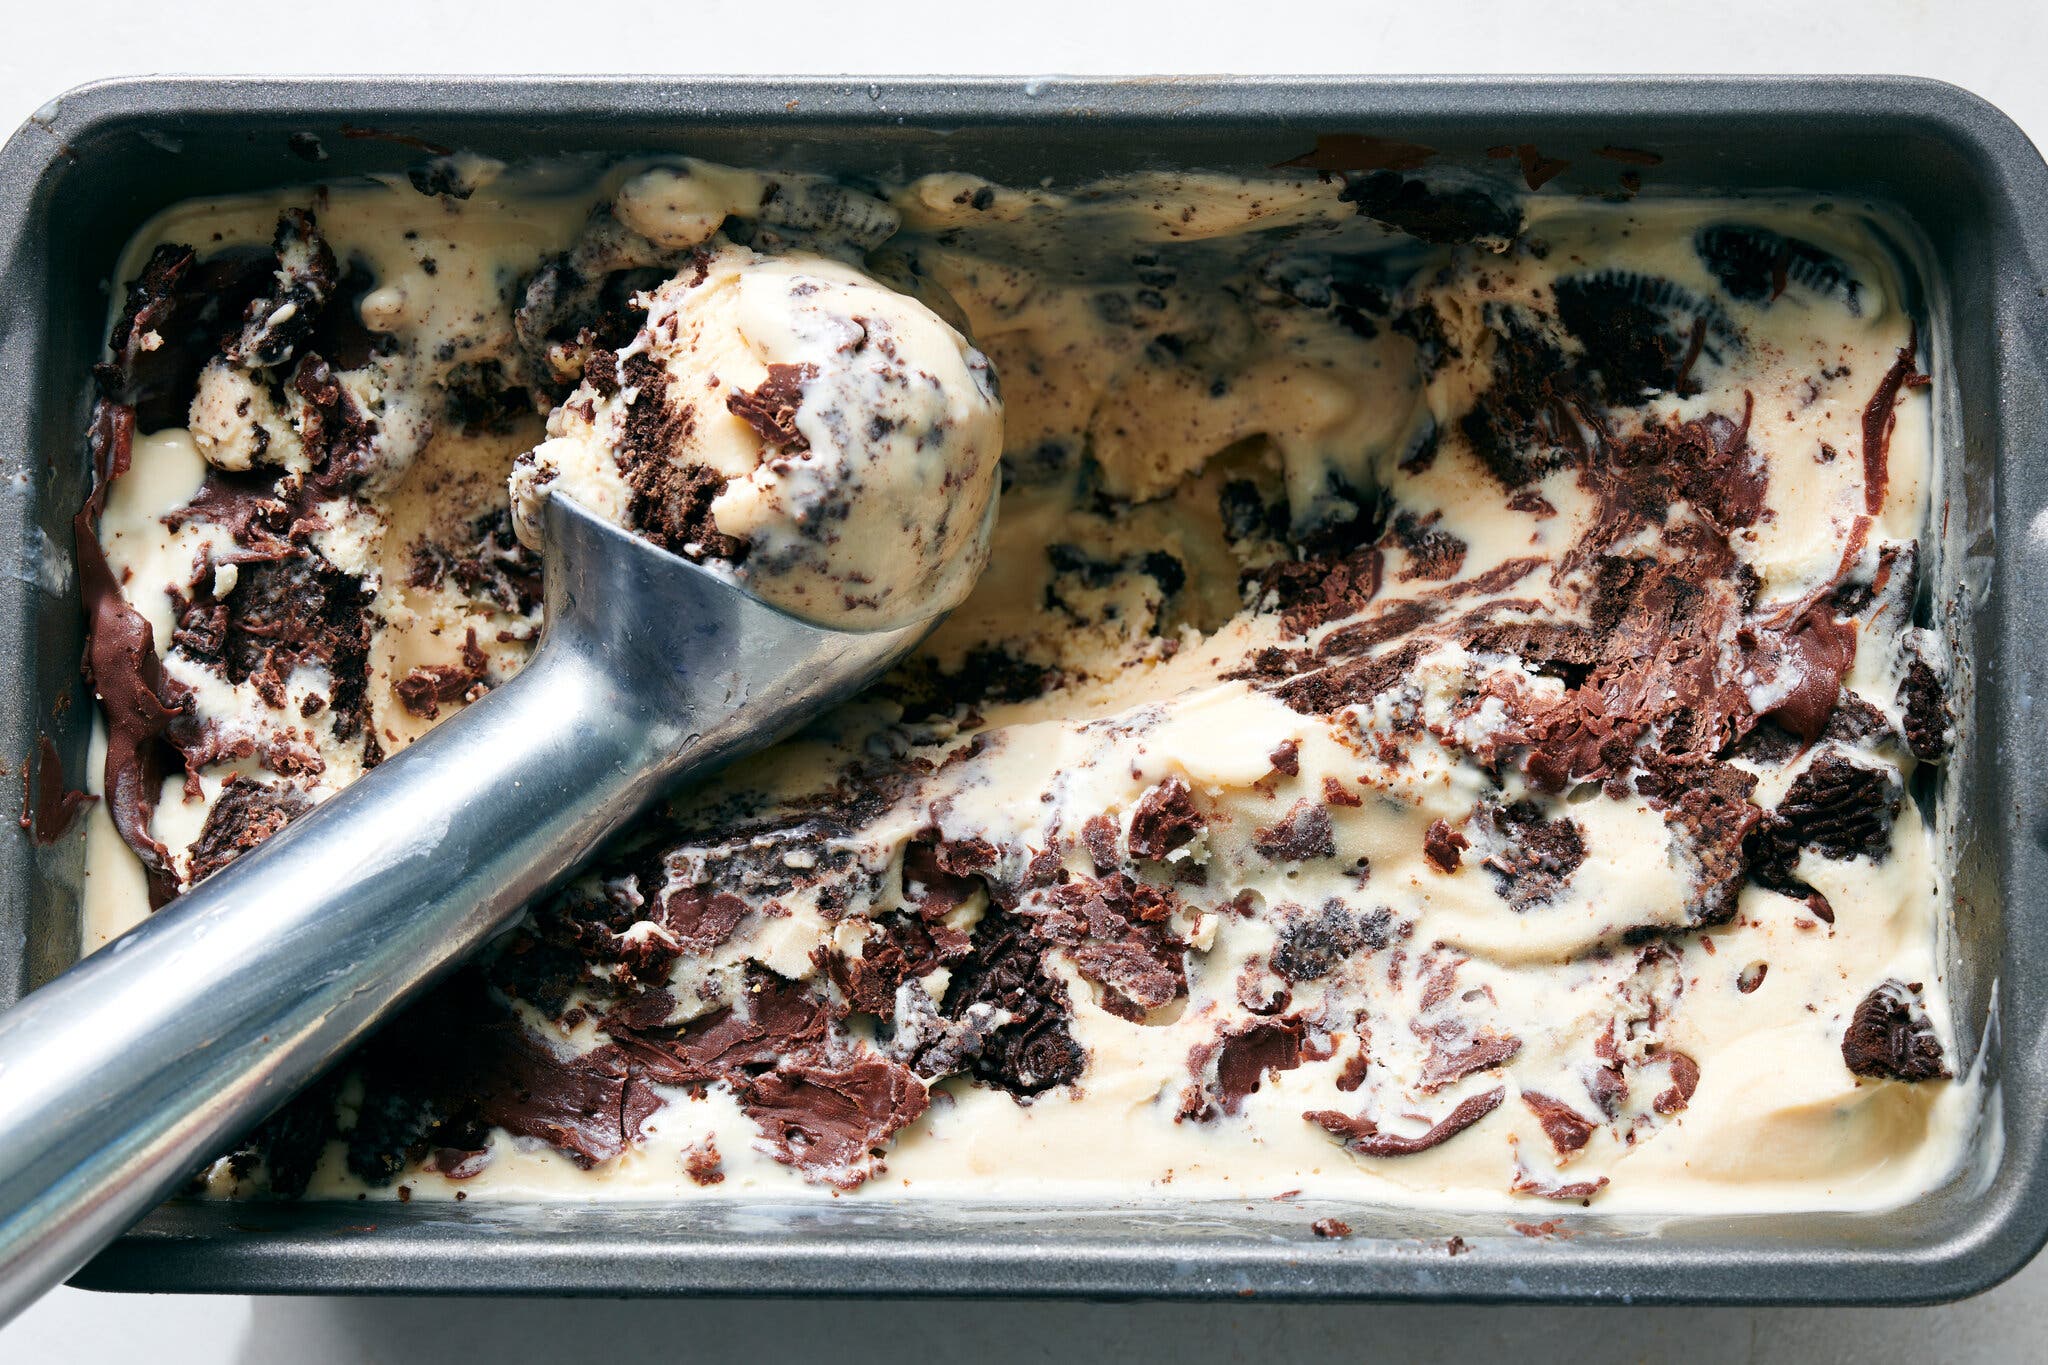
A blend of melted chocolate and peanut butter hardens when drizzled over ice cream to create chocolaty swirls.David Malosh for The New York Times. Food Stylist: Barrett Washburne.
1. Start with this secret ingredient.
The key to really delicious homemade ice cream is in the dairy aisle, but it’s not heavy cream or eggs. It’s cream cheese.
Many at-home ice cream recipes call for egg yolks to create a creamy, scoopable custard base, but a lot of commercial options are Philadelphia-style, which is made without eggs. Instead, these commercial makers use stabilizers and sweeteners that home cooks might not be able to buy.
Cream cheese already contains stabilizers, which keep the final ice cream softer, creamier and easier to scoop for a longer time. Pair it with the correct balance of milk, cream and sugar, and you’ll have a base that tastes deeply of dairy but wouldn’t necessarily be described as cream cheesy. In this carefully formulated recipe, it adds a slight tang to the final product that helps lift whatever flavors you choose.
2. Create a smooth base.
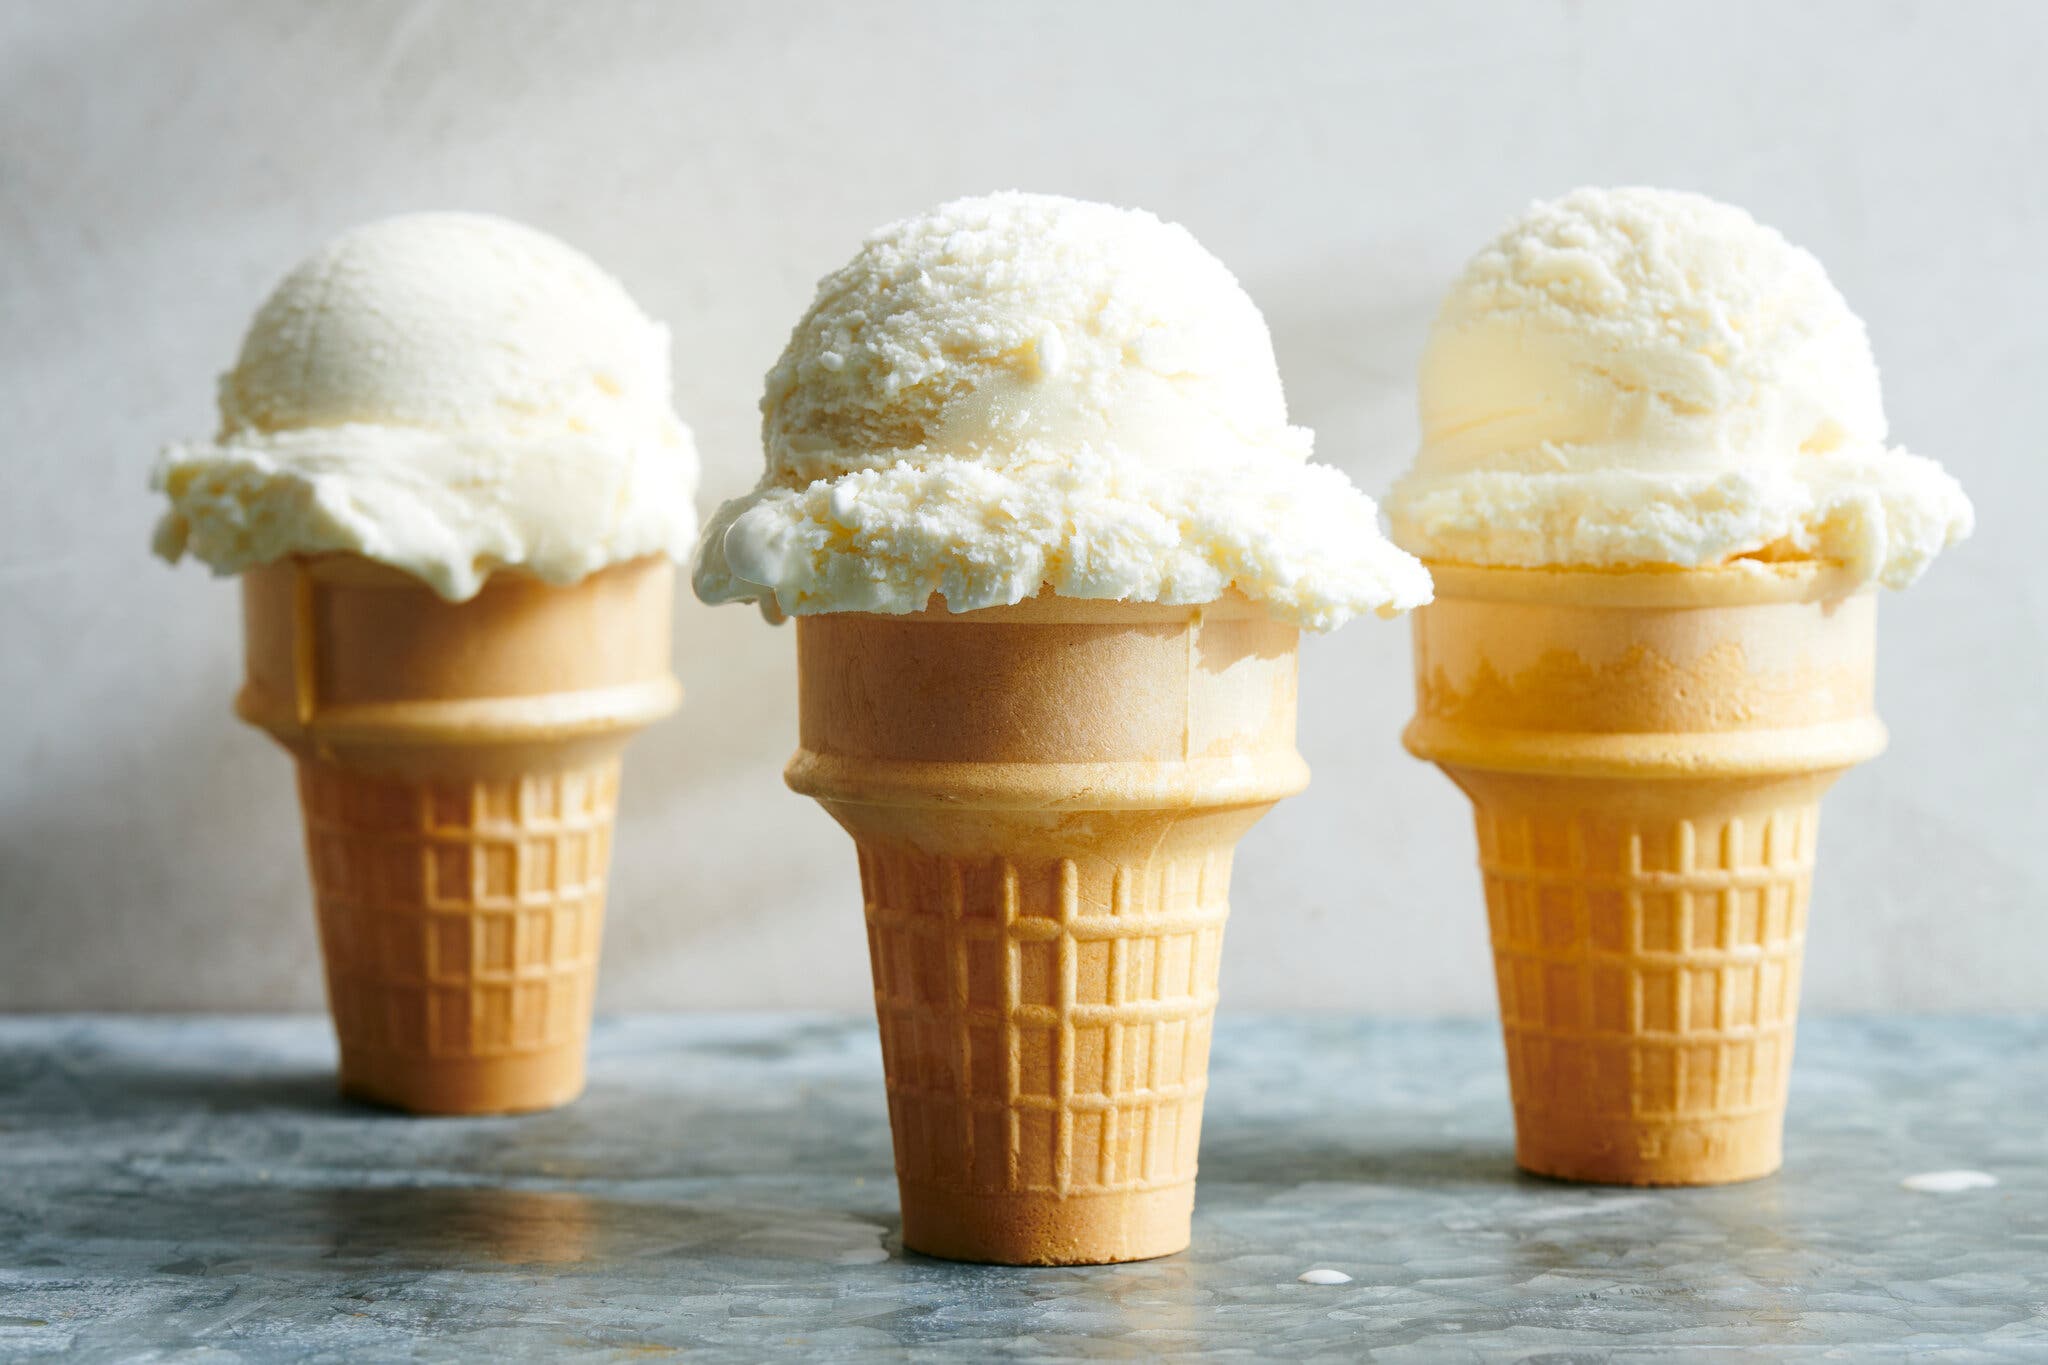
The addition of cream cheese to this vanilla ice cream base makes it even easier to scoop into perfect rounds.David Malosh for The New York Times. Food Stylist: Barrett Washburne.
It’s important to add the cream cheese at the last stage of this base recipe. After the milk is warmed, it’s poured over room-temperature cream cheese to prevent lumps and curdling. If the cream cheese is still a little cold and leaves tiny clumps, the mixture can be passed through a fine-mesh sieve.
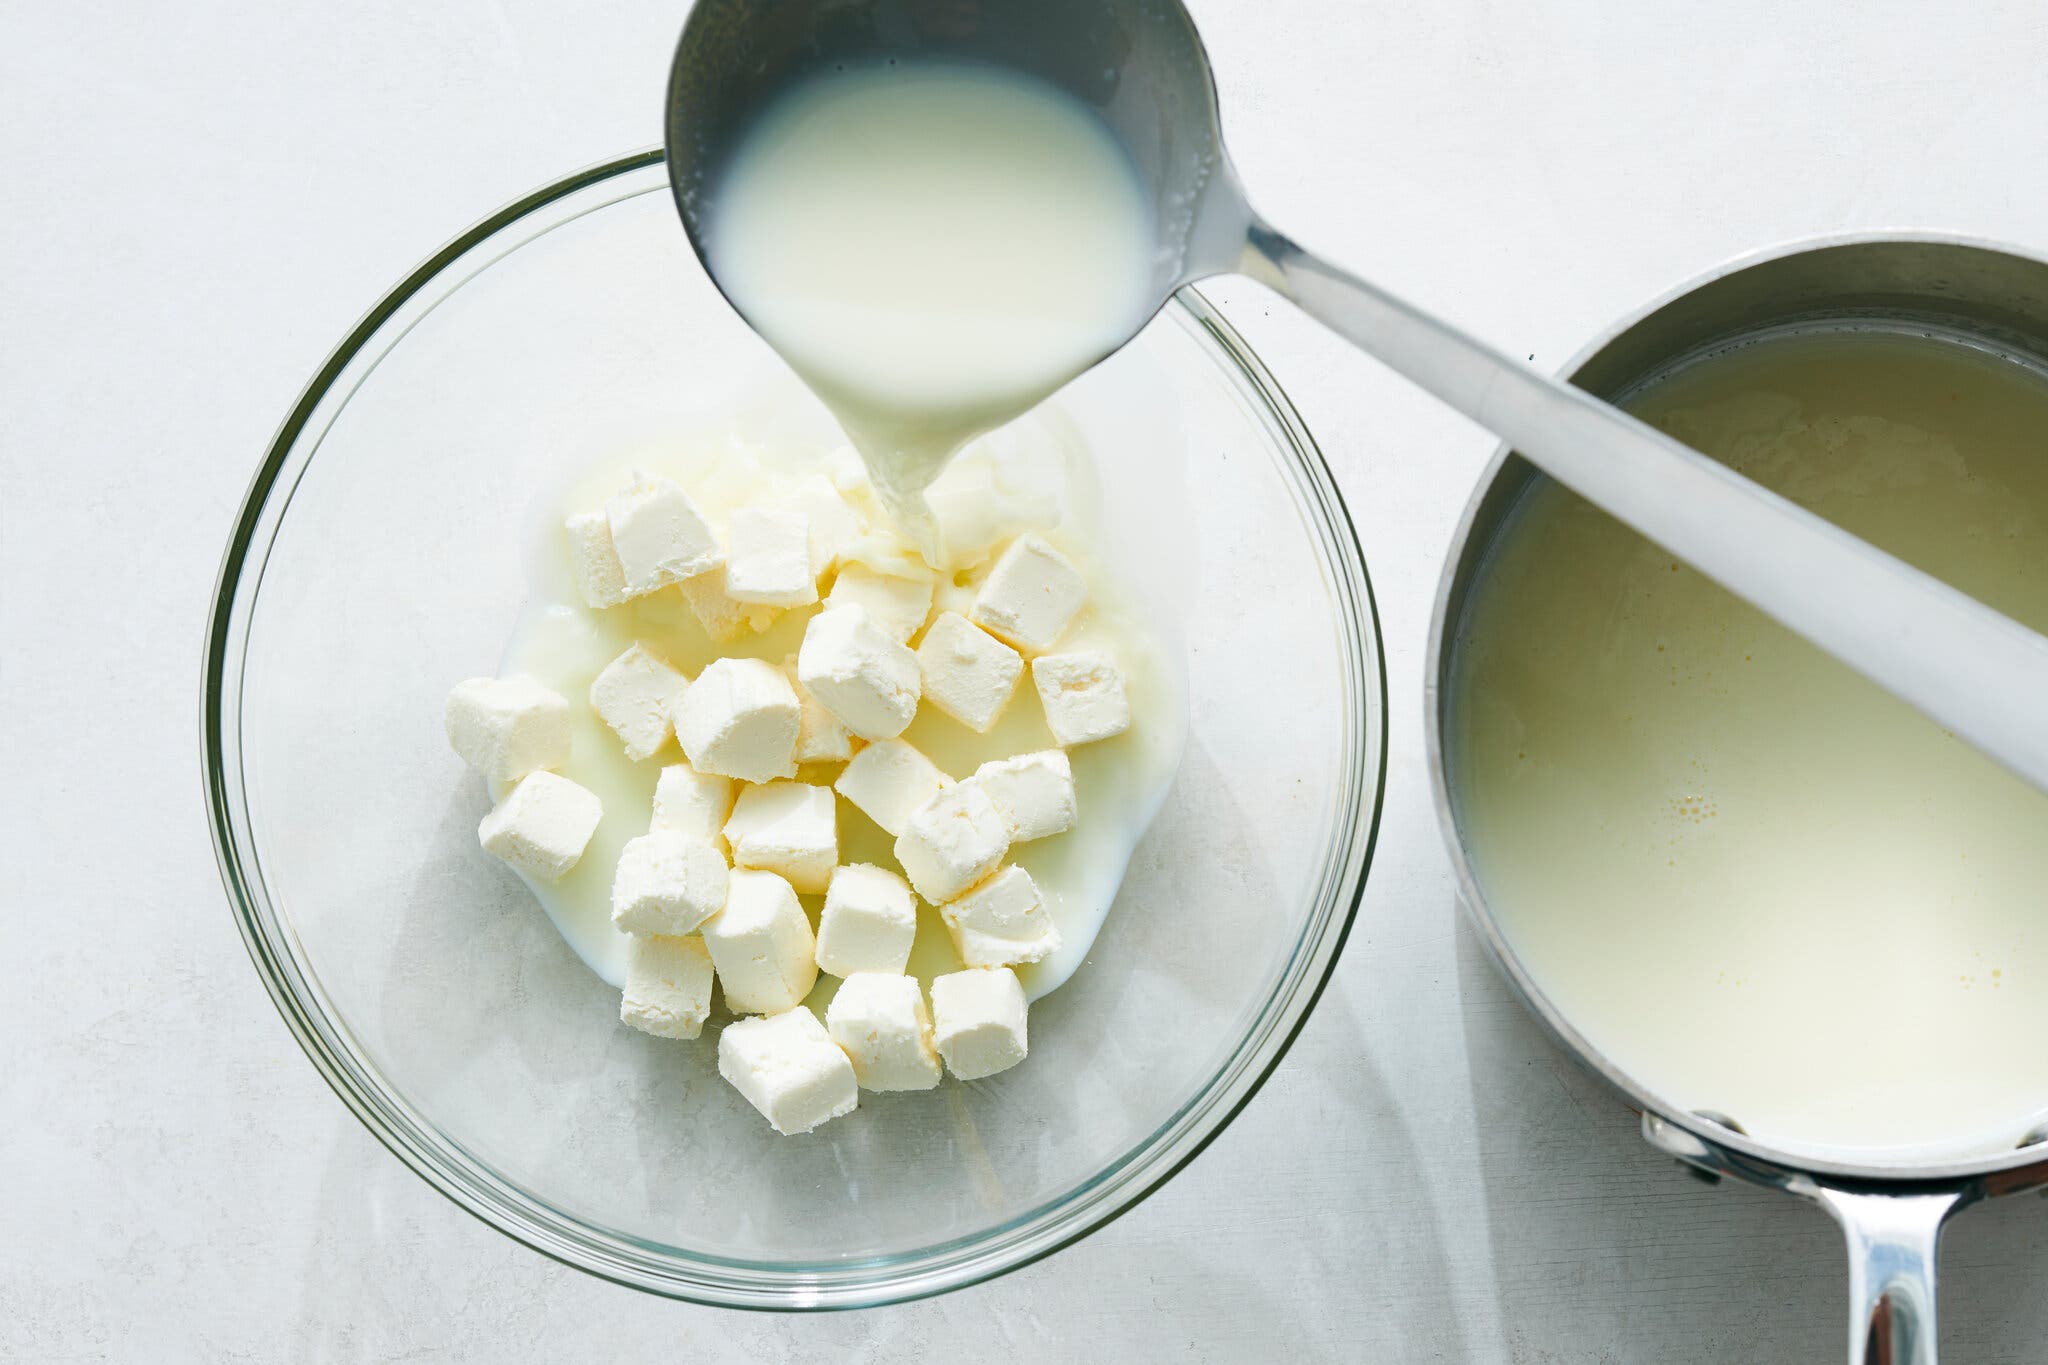
Cutting cream cheese into small cubes helps it melt smoothly into hot milk.David Malosh for The New York Times. Food Stylist: Barrett Washburne.
3. Chill well before churning.
Setting the base in an ice bath before transferring it to the refrigerator gives it a head start on chilling. You’ll want to keep it in the fridge for a minimum of four hours (and a maximum of two days). Often referred to as the base’s aging process, this time allows the flavor to develop and deepen. Think of this period as you would resting cookie dough: It lets the flavors mingle and really get to know one another.
While there is some debate (notably as it relates to custard-based ice creams) over the impact of this aging process on final flavor and texture, the most compelling reason for doing it is that it guarantees a very cold base, which will churn up more smoothly. (A crucial part of the process is ensuring everything is as cold as possible so that the final freezing stages happen quickly.)
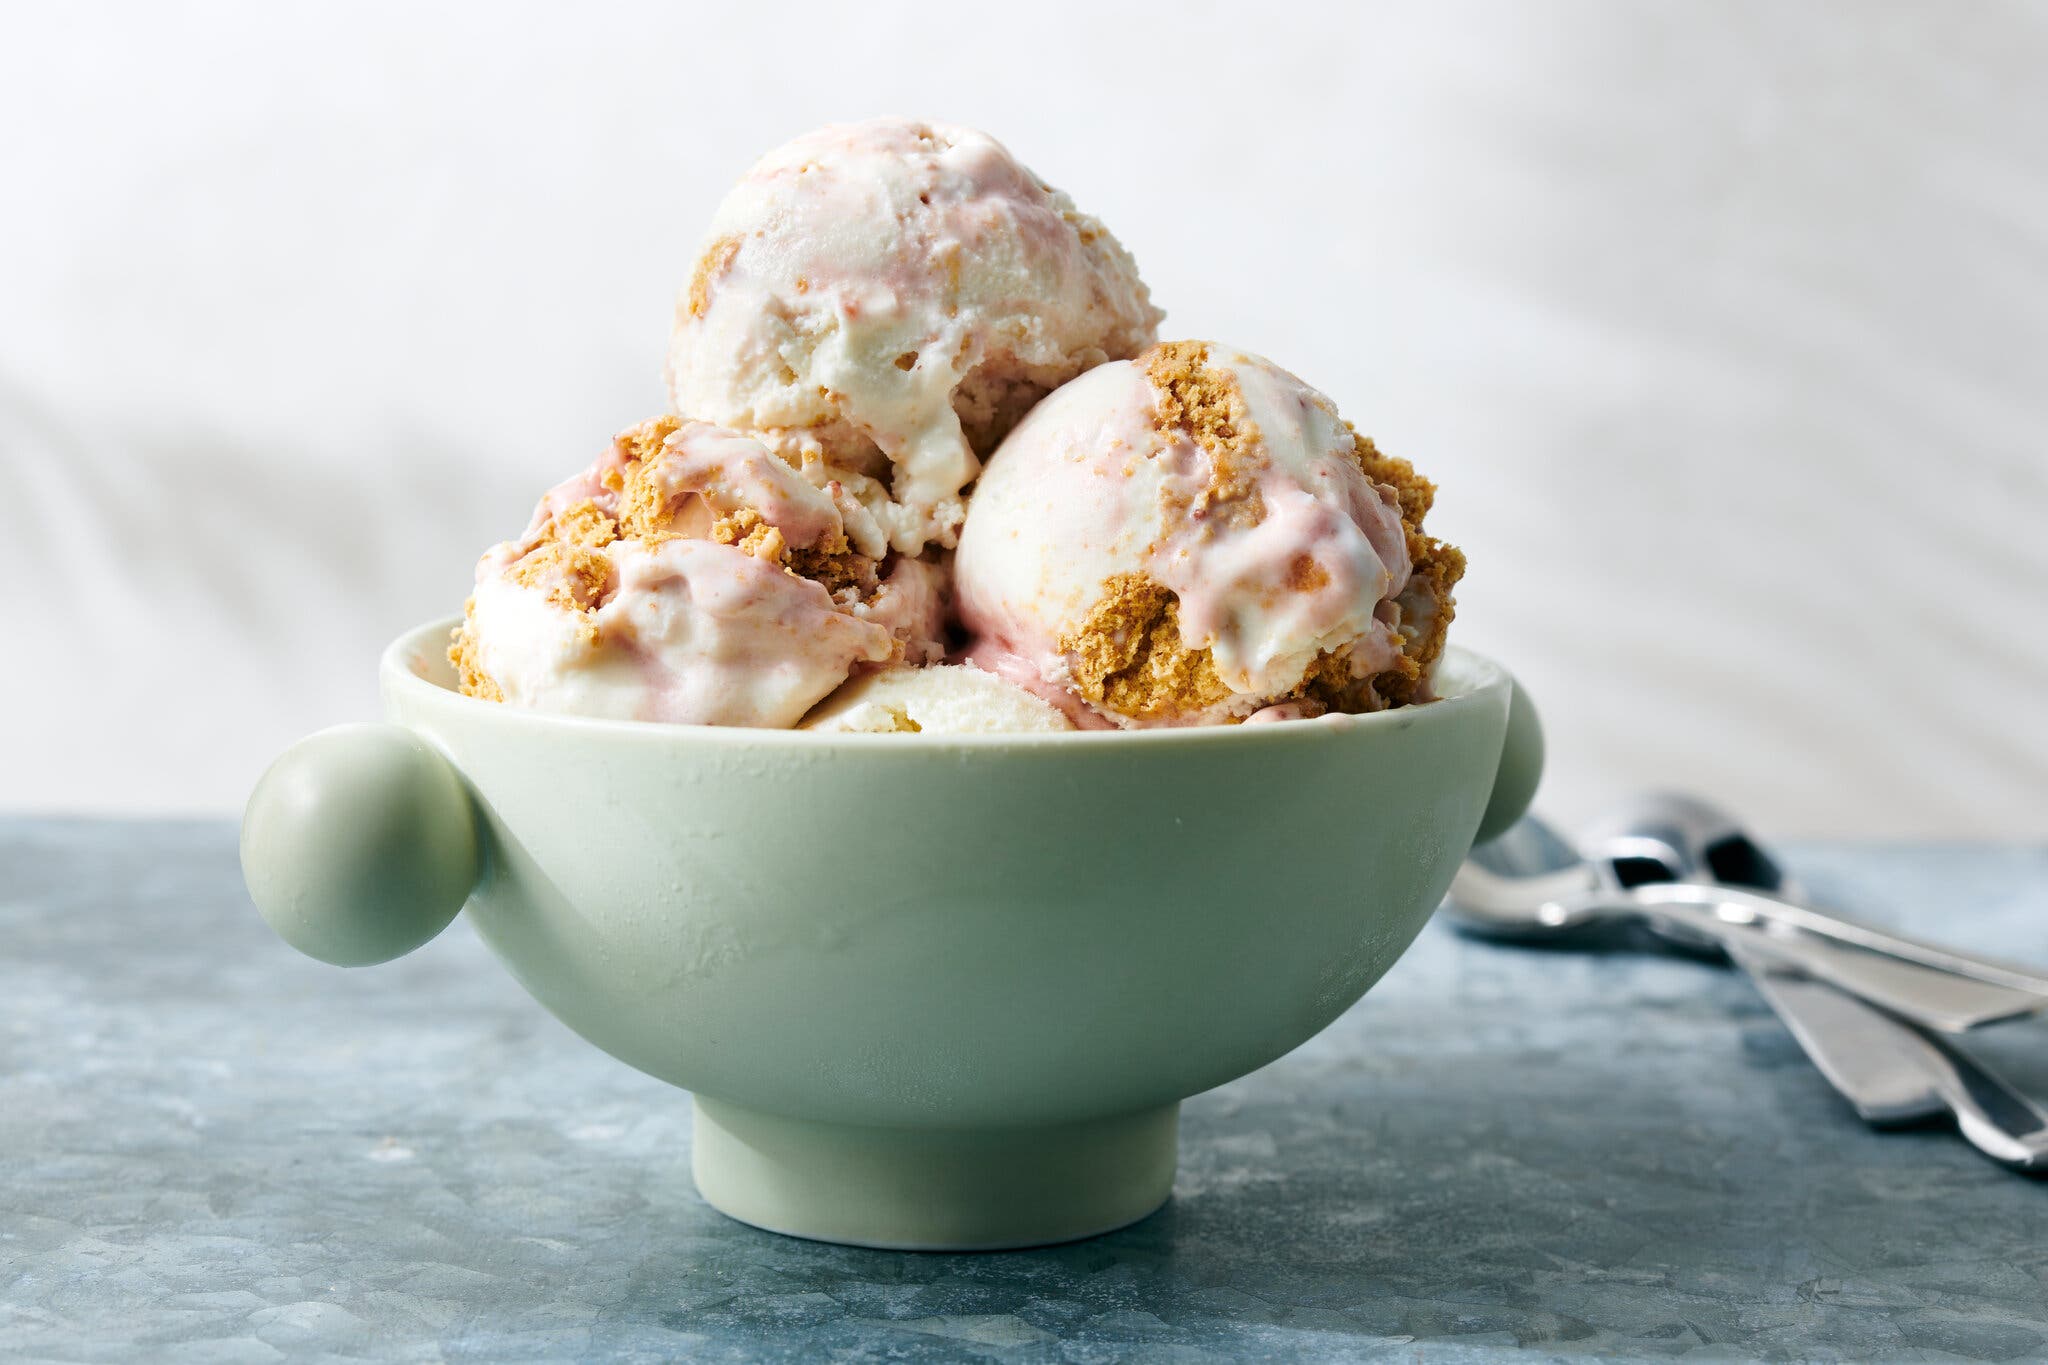
Strawberry jam mixed with cream cheese creates a tangy pink swirl in these scoops.David Malosh for The New York Times. Food Stylist: Barrett Washburne.
4. Use a baking pan for the final freeze.
Aside from an ice cream maker, the only other equipment required here is a standard metal loaf pan. Its benefits are twofold: By freezing the pan before making the base, you’re ensuring that the just-churned ice cream lands in an ice-cold dish, which helps minimize how much of the base melts between churning and freezing (and, as a result, how many ice crystals form). Two, the loaf pan makes easy work of layering in ripples or mix-ins. After adding half of the just-churned ice cream to the pan, swirl or layer in any additions before topping with the rest of the ice cream and mix-ins.
5. Create your own flavors.
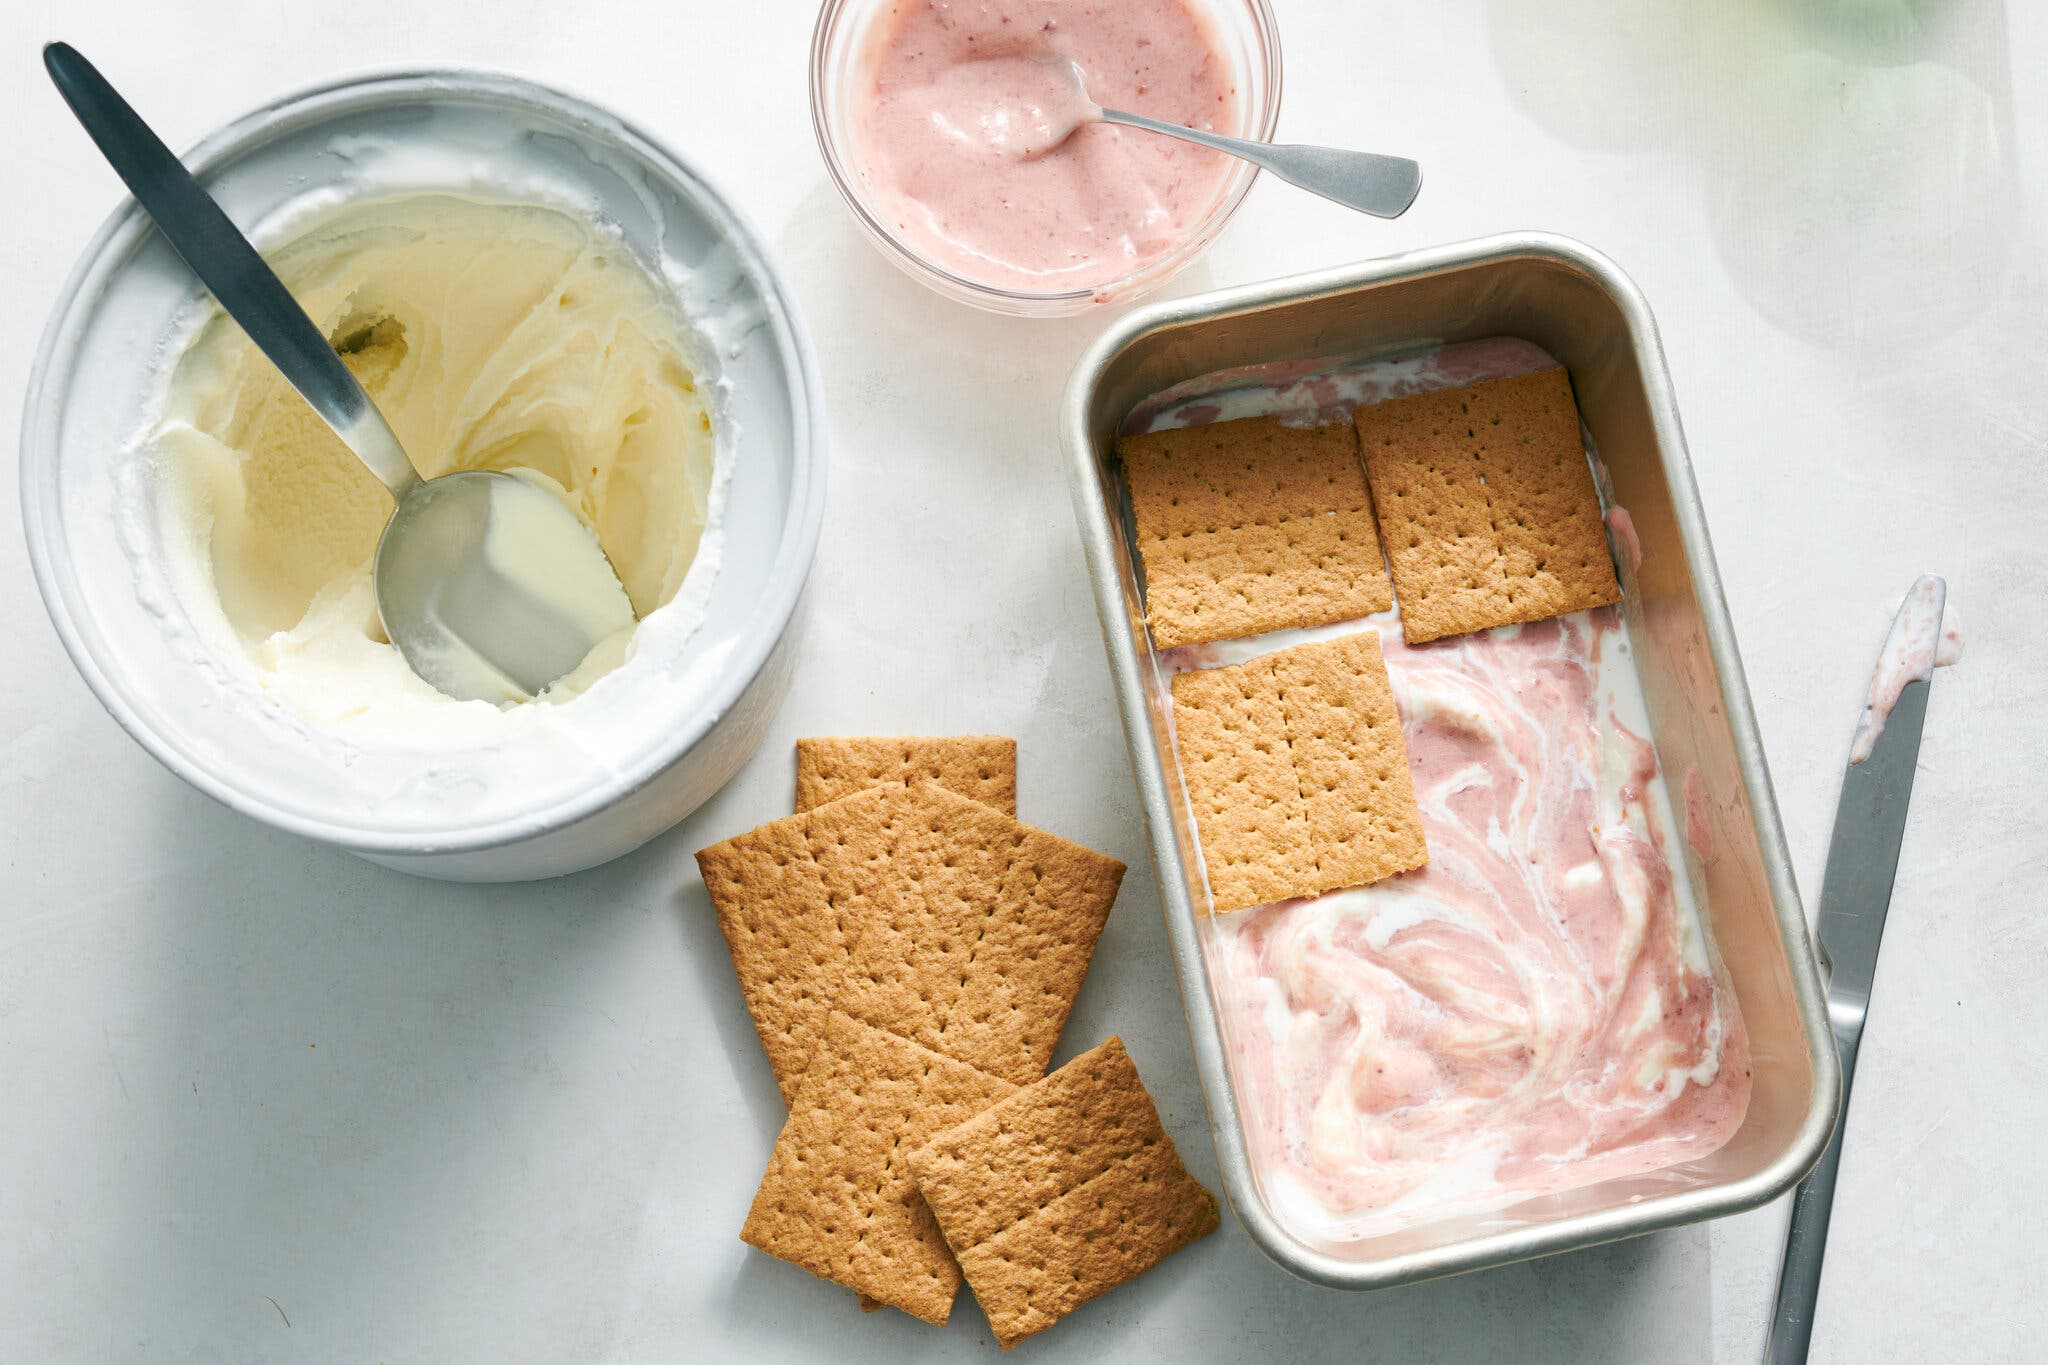
Graham crackers are added whole to create dramatic ripples when the finished ice cream is scooped.David Malosh for The New York Times. Food Stylist: Barrett Washburne.
Mix-ins — and not the sweet-cream base — probably define many of your favorite flavors. (Looking at you, cookies and cream.) And it’s true that swirling in saucy additions and layering in other ingredients, as with the strawberry jam and graham crackers in this cheesecake ice cream, are simple ways to create a new flavor without adjusting the base.
But it’s just as easy to steep herbs or crushed coffee beans in your base to make your very own fresh mint or cold brew ice cream. Once you’ve got a handle on the basics, let your imagination run wild.
Follow New York Times Cooking on Instagram, Facebook, YouTube, TikTok and Pinterest. Get regular updates from New York Times Cooking, with recipe suggestions, cooking tips and shopping advice.
